

How Much To Install A Fifth Wheel Hitch
by Chiamaka Ikeanyi
Sometimes, using the default terminal sucks. You want to go out of the ordinary, to add life to the boring terminal and improve your productivity.
Z shell (Zsh) is a Unix shell congenital on meridian of bash (the default shell for macOS) with a large number of improvements.
In this walk-through, we will configure iTerm2 with ZSH and its dependencies. This is a no-brainer, and after this, y'all'll ponder the reason for not discovering ZSH earlier. Well, since y'all're here already, let'due south kick-beginning this.
Keynotes
- Homebrew installation
- iTerm2 installation
- ZSH and Oh My ZSH installations
- Setting up the dependencies to create a beautiful terminal
Step 1: Install Homebrew
Homebrew is a free and open-source software package direction system that simplifies the installation of software on Apple's macOS.
Before installing Homebrew, we need to install the CLI tools for Xcode. Open up your terminal and run the command:
xcode-select —-install If you get an error, run xcode-select -r to reset xcode-select.
Then, install Homebrew.
/usr/bin/scarlet -east "$(curl -fsSL https://raw.githubusercontent.com/Homebrew/install/master/install)" Step 2: Install iTerm2
iTerm2 is a replacement for terminal and the successor to iTerm. Most software engineers prefer iTerm2 over the default last that ships with macOS equally a upshot of its cool features. Y'all can integrate zsh into iTerm2 to increase productivity.
To install iTerm2, run the command:
mash cask install iterm2 Step iii: Install ZSH
Zsh is a crush designed for interactive use, although information technology is also a powerful scripting language.
By default, macOs ships with zsh located in/bin/zsh.
Let's install zsh using brew and make iTerm2 utilise it.
brew install zsh Stride 4: Install Oh My Zsh
"Oh My Zsh is an open source, community-driven framework for managing your zsh configuration. It volition non brand y'all a 10x developer…but you might experience like 1"
— Robby Russell
It runs on Zsh to provide cool features configurable within the ~/.zhrc config file. Install Oh My Zsh by running the command
sh -c "$(curl -fsSL https://raw.githubusercontent.com/robbyrussell/oh-my-zsh/master/tools/install.sh)" Bank check the installed version
zsh --version You can upgrade information technology to get the latest features it offers.
upgrade_oh_my_zsh Restart iTerm2 to dive into the new feel of using Zsh. Welcome to the "Oh My Zsh" world ?.
That's not all. At present, we will install the dependencies to get the all-time out of Zsh.
Step 5: Change the Default Theme
Oh My Zsh comes bundled with a lot of themes. The default theme is robbyrussell, but you can modify it to any theme of your choice. In this scenario, I changed it to agnoster, an already pre-installed theme.
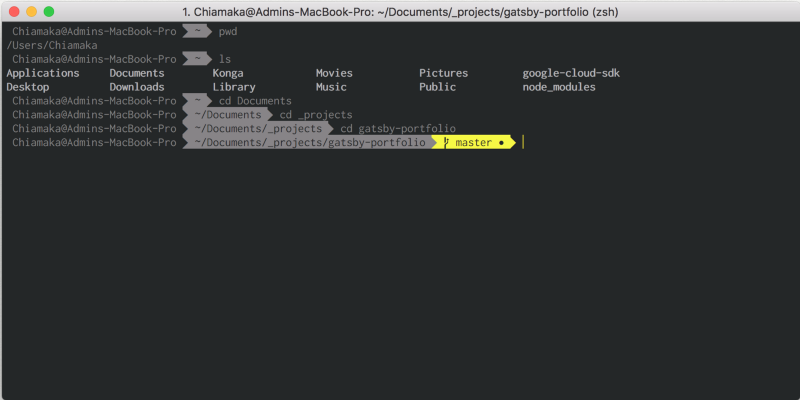
You then need to select this theme in your ~/.zshrc. To open the config file (.zshrc), run the control:
nano ~/.zshrc 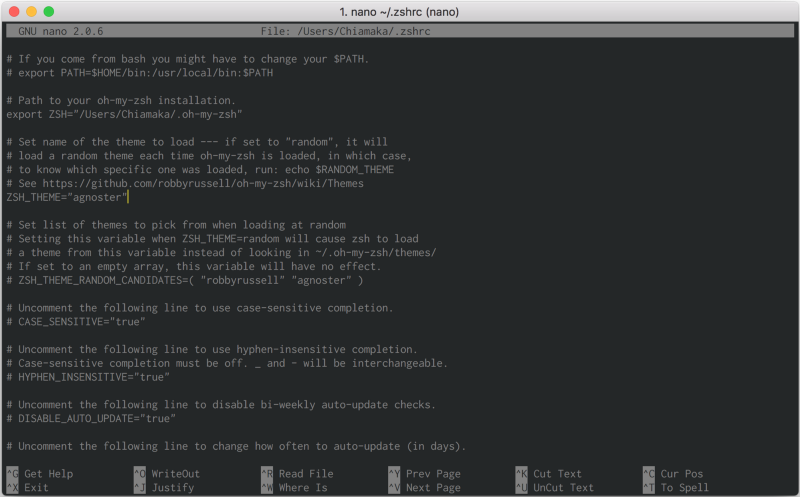
Or open the file in a text editor with
open ~/.zshrc 
Set the zsh theme and update your changes
source ~/.zhrc Using a Custom Theme
To install another theme not pre-installed, clone the repository into custom/themesdirectory. In this scenario, nosotros'll install powerlevel9k,
$ git clone https://github.com/bhilburn/powerlevel9k.git ~/.oh-my-zsh/custom/themes/powerlevel9k Then, select this theme in your ~/.zshrc
ZSH_THEME="powerlevel9k/powerlevel9k" Update your changes by running the command source ~/.zshrc
Navigate to iTerm2 > Preferences > Profiles > Colors if yous wish to change the background color of the terminal.
The selected theme in this scenario requires powerline fonts. So, allow's install that.
Step 6: Install Fonts
I will be using Inconsolata. Get your preferred font out of these powerline fonts. And so, download and install information technology.

Or download the unabridged font.
git clone https://github.com/powerline/fonts.git cd fonts ./install.sh To modify the font, navigate to iTerm2 > Preferences > Profiles > Text > Modify Font.
Now, you can run across Inconsolata listed as one of the fonts. Select your preferred font. For fonts that support ligatures like FiraCode, check the "Use ligatures" option to view your arrows and other operators in a stylish fashion like ( → ).

Step 7: Install Color Scheme
Let's change the color scheme to bring out the beauty of our terminal. Navigate to iTerm2-Color-Schemes and download the Aught folder. Then, extract the downloaded folder cos what we demand resides in the schemes folder.
Navigate to iTerm2 > Preferences > Profile > Colors > Color Presets > Import
- Navigate to the schemes folder and select your preferred colour schemes to import them.
- Click on a specific colour scheme to activate it. In this scenario, I activated Batman which is my preferred color scheme.

Tada! ? We're done with the basic settings.

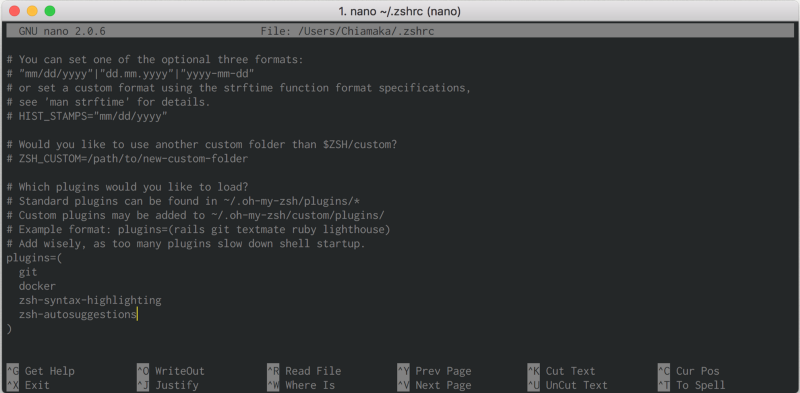
Step 8: Install Plugins
Oh My ZSH comes preloaded with a git plugin. To add together more, for instance, docker, motorcar-suggestion, syntax highlighting and more than:
- Clone the Git repository
git clone https://github.com/zsh-users/zsh-docker.git ${ZSH_CUSTOM:-~/.oh-my-zsh/custom}/plugins/zsh-docker - Head over to
.oh-my-zsh > custom > pluginsdirectory to view the cloned directory. To access this, run the controlopen ~/.oh-my-zsh - Add the plugin to the plugin section of the config file
~/.zshrcshown below - Update your changes by running the command
source ~/.zshrc
Step 9: Add Aliases
Aliases are shortcuts used to reduce the time spent on typing commands. Add together aliases to commands you run in the section shown below.

dckimgs executes docker images controlThanks for reading .
If you know about other means of improving productivity using ZSH, you lot tin driblet them on the comment section, I will exist glad to hear from yous.
Larn to code for complimentary. freeCodeCamp's open source curriculum has helped more than than twoscore,000 people get jobs as developers. Get started

Source: https://www.freecodecamp.org/news/how-to-configure-your-macos-terminal-with-zsh-like-a-pro-c0ab3f3c1156/
Posted by: wilsonmolaing1942.blogspot.com
0 Response to "How Much To Install A Fifth Wheel Hitch"
Post a Comment